Initial Setup
Add Organization Guide
Guide for creating and managing organizations in CyberOptix.
Overview
Organizations in CyberOptix represent individual clients or business units. Each organization maintains separate assets, findings, integrations, and user permissions.
Create an Organization
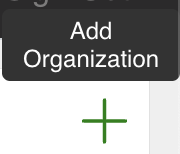
Step 1: Open Add Organization Form
Click the Add icon in the Organizations section.
Step 2: Complete Organization Details
Fill out the organization information:
- Name - Organization or client name
- Nickname - Organization nickname or alias
- Primary Domain - Add the primary domain name
- Enabled - Toggle to activate the organization
- Ongoing - Toggle for active/continuous engagements
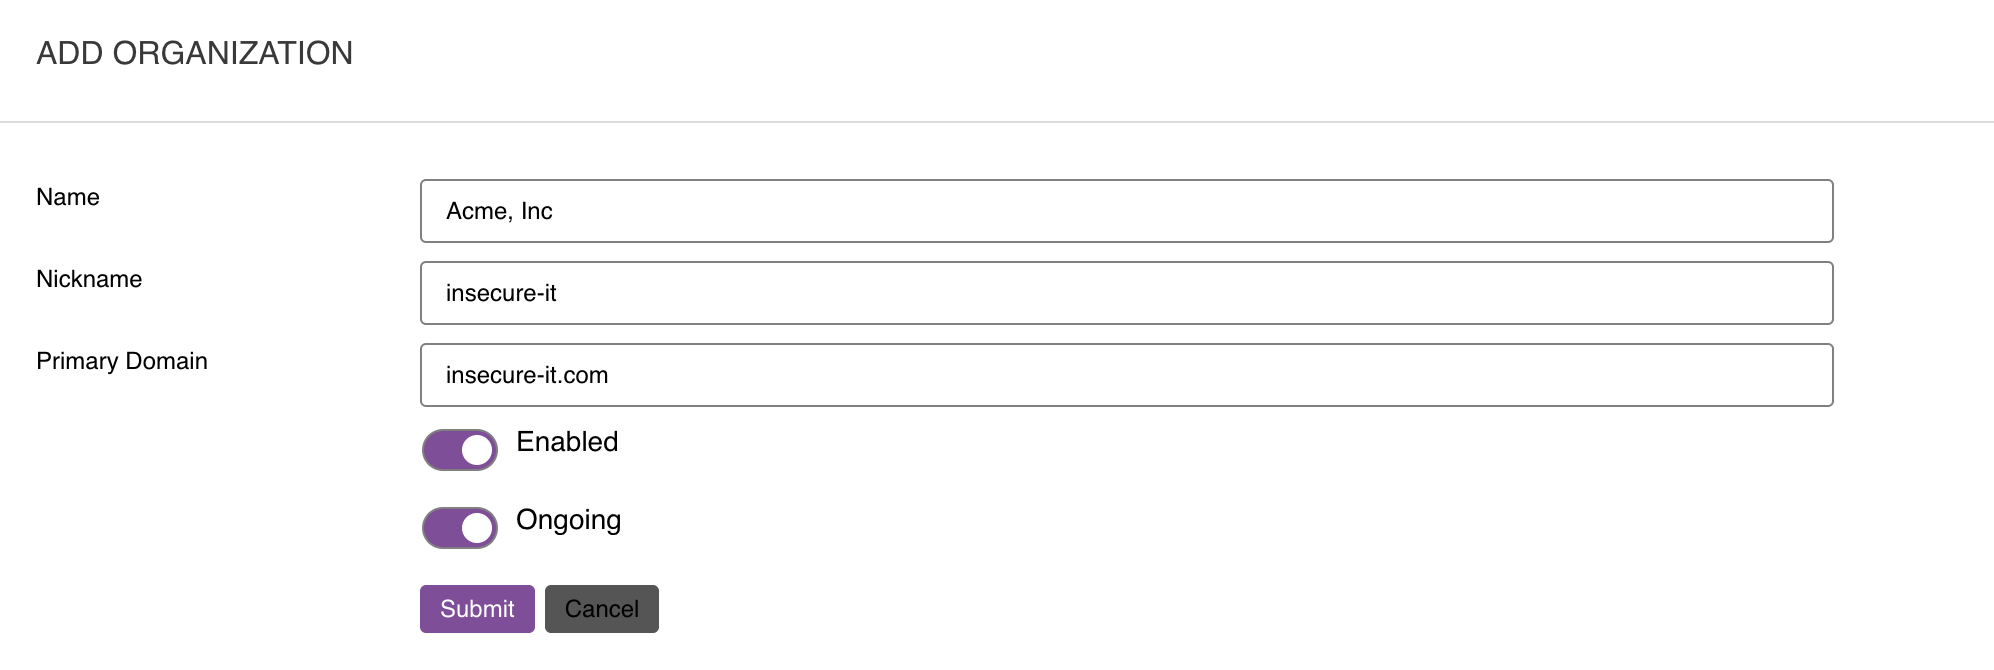
Step 3: Submit
Click Submit to create the organization.
Switch to Organization
Step 1: Open Organization Selector
Hover over No Organization in the top navigation bar.
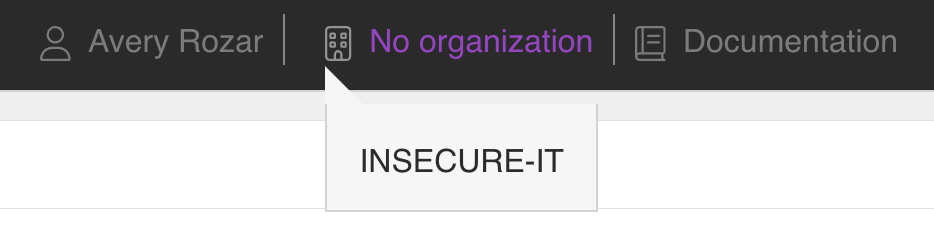
Step 2: Select Organization
Choose the newly created organization from the dropdown menu.

The interface will now display all data associated with the selected organization.
Organization Settings
After creating an organization, you can configure:
- Business Units - Departmental or team structure
- Tags - Custom labels for asset categorization
- Users - Access control and role assignments
- Integrations - Organization-specific cloud, code, and security tool integrations
- Zones - Network and asset groupings
Multi-Organization Management
CyberOptix supports managing multiple organizations from a single interface:
- Quick Switching - Change between organizations without logging out
- Isolated Data - Each organization maintains separate assets and findings
- Shared Templates - Global templates can be applied across organizations
- User Assignment - Users can have access to multiple organizations with different roles
Updated 8 months ago