Adding Subnets and URLs
Subnet and URL Management Guide
Guide for adding and managing subnets and URLs in CyberOptix.
Overview
Subnets and URLs define the scope of security testing and monitoring in CyberOptix. These assets must be added to your organization before they can be assigned to zones for scanning and discovery.
Asset Sources:
- Manual Entry: Add subnets and URLs directly
- OSINT Discovery: External URLs automatically added from OSINT results
- Cloud Integration: Subnets discovered from cloud platforms (Azure, AWS, Google Cloud)
Prerequisites
- Organization configured in CyberOptix
- Network CIDR ranges or IP addresses to monitor
- Web application URLs to test
Add Subnet
Step 1: Open Add Subnet Form
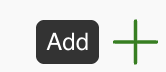
Click the Add icon in the Subnets section.
Step 2: Enter Subnet Details
Enter the subnet in CIDR notation and click Submit.

CIDR Notation Examples:
| CIDR | IP Range | Hosts | Use Case |
|---|---|---|---|
192.168.1.0/24 | 192.168.1.0 - 192.168.1.255 | 254 | Small office network |
10.0.0.0/16 | 10.0.0.0 - 10.0.255.255 | 65,534 | Large enterprise network |
172.16.0.0/12 | 172.16.0.0 - 172.31.255.255 | 1,048,574 | Very large network |
192.168.1.100/32 | 192.168.1.100 | 1 | Single host |
For Single IP Addresses:
Use /32 CIDR notation (e.g., 203.0.113.45/32)
Add URL
Step 1: Open Add URL Form
Click the Add icon in the URLs section.
Step 2: Enter URL Details
Enter the complete URL and click Submit.

URL Format Requirements:
| Valid | Invalid | Reason |
|---|---|---|
https://example.com | example.com | Missing protocol |
http://app.example.com | app.example.com | Missing protocol |
https://example.com/app | https://example.com/app/ | Trailing slash optional |
Supported Protocols:
https://(recommended)http://
Assign Assets to Zones
After adding subnets and URLs:
- Navigate to Zones
- Create or select a zone
- Assign subnets and URLs to define the zone's scope
- Assign scanner groups to perform testing
OSINT-Discovered URLs
CyberOptix automatically discovers and adds URLs through OSINT monitoring:
Discovery Sources:
- Certificate transparency logs
- DNS records
- Public code repositories
- Web crawling
- Third-party data sources
Auto-Added URLs:
- Appear in the URLs section with OSINT source tag
- Can be assigned to zones for testing
- Updated automatically as new assets are discovered
Subnet Management
Common Network Ranges
Private Network Ranges (RFC 1918):
10.0.0.0/8- Class A private network172.16.0.0/12- Class B private networks192.168.0.0/16- Class C private networks
Special Use Addresses:
127.0.0.0/8- Loopback (localhost)169.254.0.0/16- Link-local224.0.0.0/4- Multicast
Calculate CIDR Ranges
Use online CIDR calculators or command-line tools:
# Using ipcalc (Linux)
ipcalc 192.168.1.0/24

# Using sipcalc (Linux)
sipcalc 192.168.1.0/24
URL Management
URL Components
When adding URLs, consider:
- Protocol:
http://orhttps:// - Subdomain:
app.example.comvsexample.com - Port: Default (80/443) or custom (
:8080) - Path: Root (
/) or specific path (/admin)
Multiple Environments
Organize URLs by environment:
- Production:
https://app.example.com - Staging:
https://staging.app.example.com - Development:
https://dev.app.example.com
Add each environment separately for independent testing.
Best Practices
Subnet Organization:
- Add subnets by network segment (DMZ, internal, cloud)
- Use descriptive tags to categorize subnets
- Document subnet ownership and purpose
URL Organization:
- Add production URLs to production zones
- Separate staging and development environments
- Use tags to indicate application type or team
Scope Management:
- Start with narrow scopes and expand gradually
- Verify authorization before adding external assets
- Regular review and removal of decommissioned assets
Integration:
- Enable cloud integrations for automatic subnet discovery
- Configure OSINT to discover external URLs
- Review auto-discovered assets before assigning to zones
Updated 8 months ago